That was a long title...
Here's the thing. I'm an Inkscape n00b and as such any long and complex procedure description sends me into a tailspin. I've looked for tutorials on how to make a rounded rectangle have some rounded and some regular corners.... or the other way around: a rectangle having one or more rounded corners. All my searching yielded results that a seasoned pro would find simple, but which made me feel fairly incompetent.
Here's the thing. I'm an Inkscape n00b and as such any long and complex procedure description sends me into a tailspin. I've looked for tutorials on how to make a rounded rectangle have some rounded and some regular corners.... or the other way around: a rectangle having one or more rounded corners. All my searching yielded results that a seasoned pro would find simple, but which made me feel fairly incompetent.
So I came up with my own solution and here is how it goes:
Btw, all the images can be enlarged by simply clicking on them.
Click 1:
Btw, all the images can be enlarged by simply clicking on them.
Click 1:
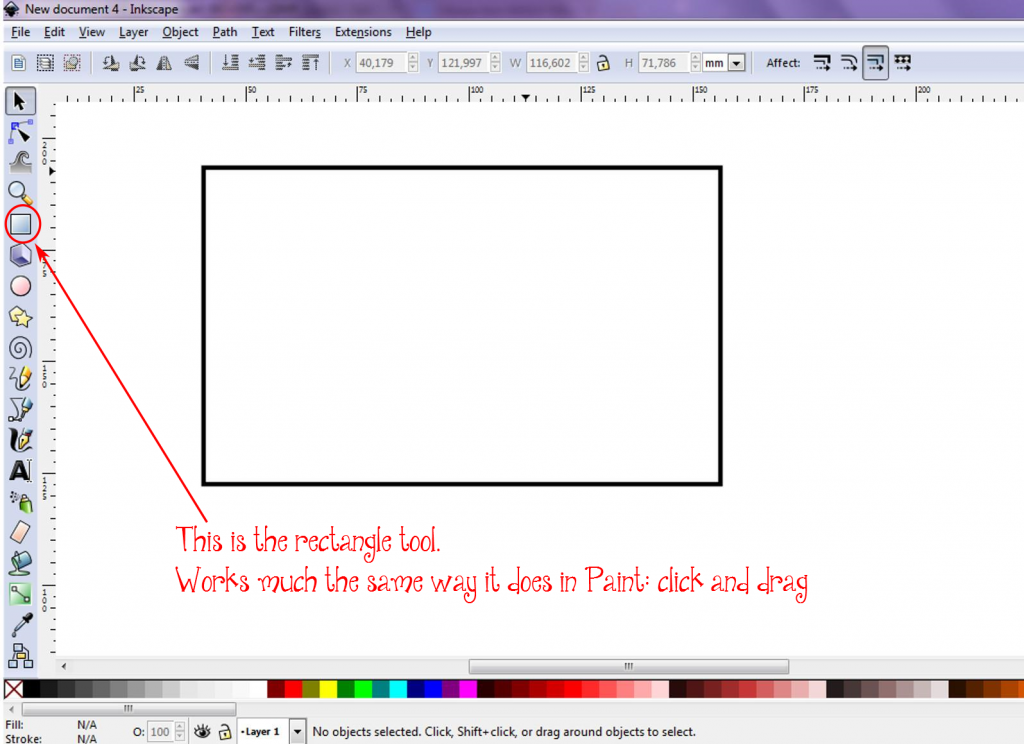
Click the rectangle tool and draw a rectangle. Doesn't have to be what you're looking for as an end result.
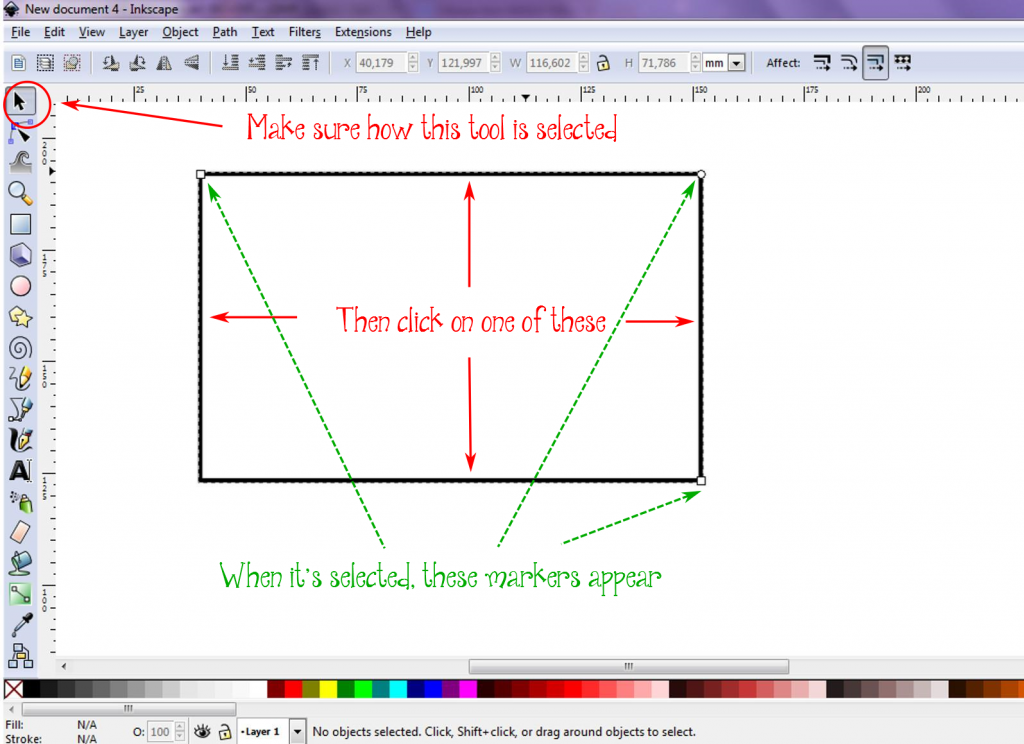
Click on one of the lines of your rectangle to select it.
Look up. You should see something like this bar. Click in the measurement drop-down menu and select your measurement units. My inner engineer likes millimeters, but you go with whatever you like. W is for width, H is for height, so enter the measurements you want for your rectangle.
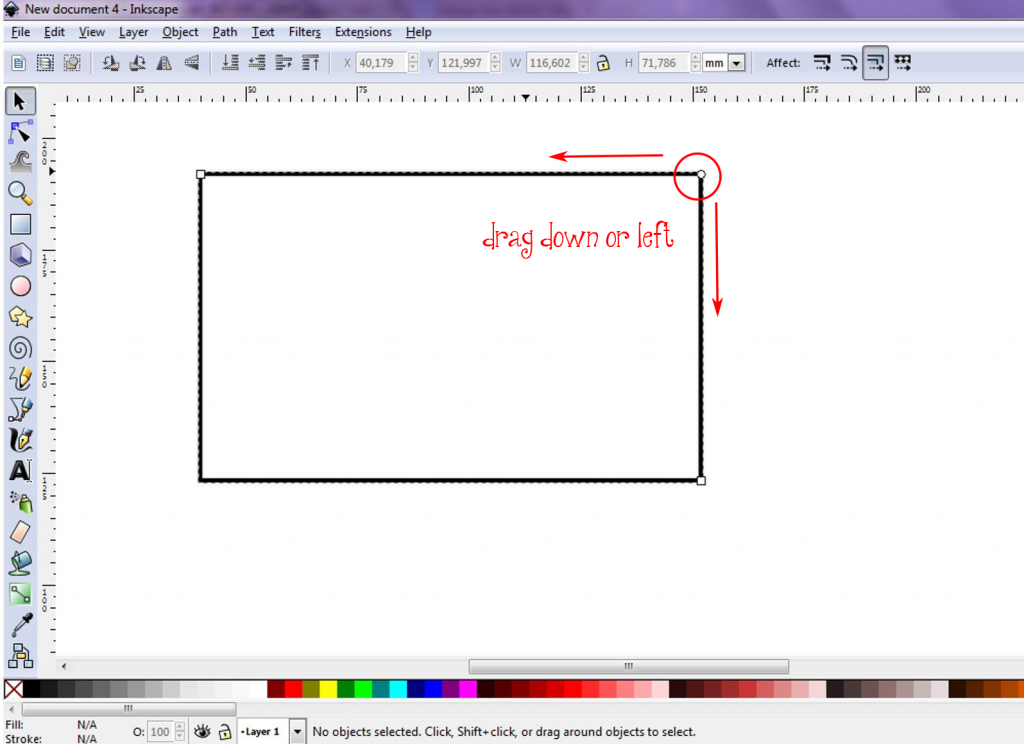
On your rectangle, there is a little circle point. This will make it a rounded rectangle. If you click and drag it up or down, it gives you a curve on all four corners. You can also adjust this on that menu up top, for the sake of precision.
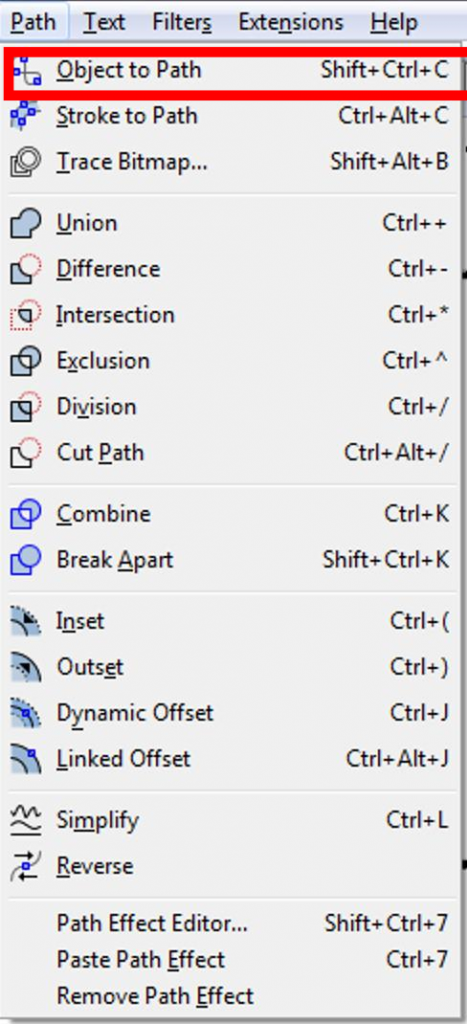
Find the Path drop-down menu and click it.
Click 6:
The first option on it is "Object to Path". Click that.
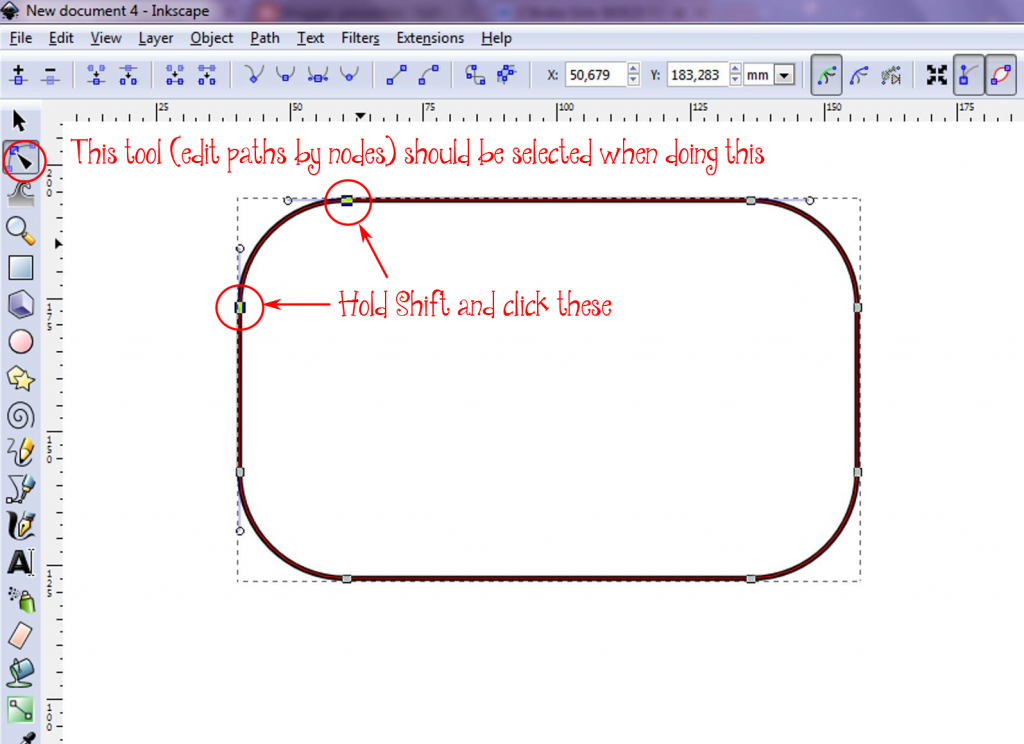
Now your rectangle has a red line running through it. Pick out the corner you want to remake. There should be two little circle points on each side of it. Hold the Shift key and click on each dot.
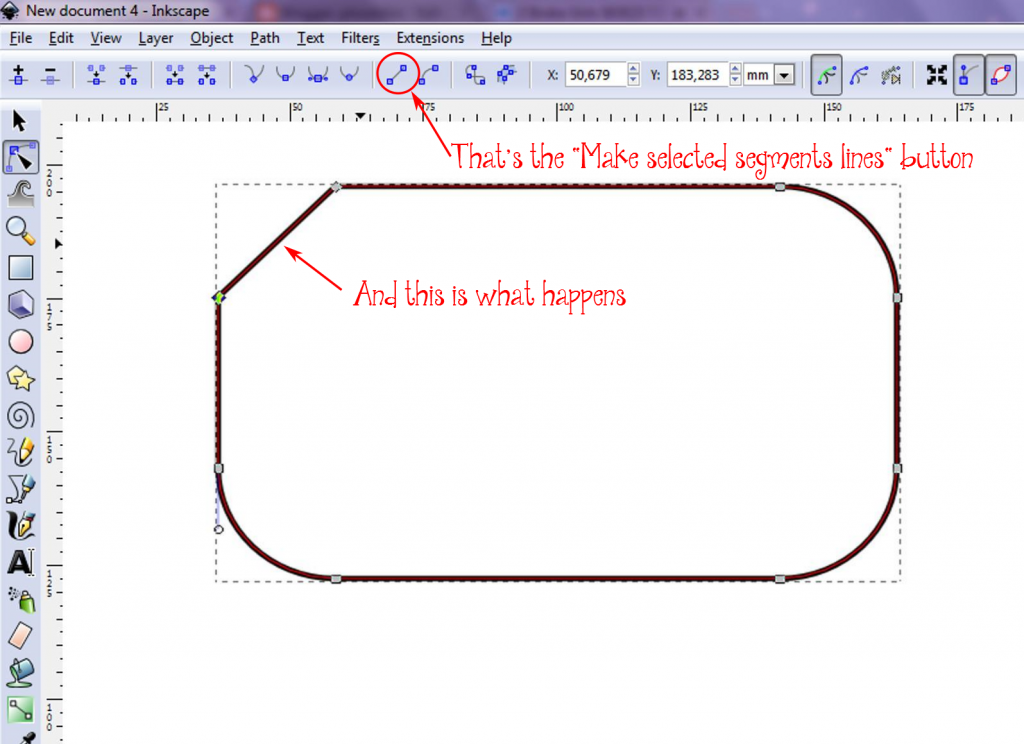
Find the "Make selected segments lines" button and click that. Suddenly, instead of a curve, there is a line connecting your two selected points.
Click 9:
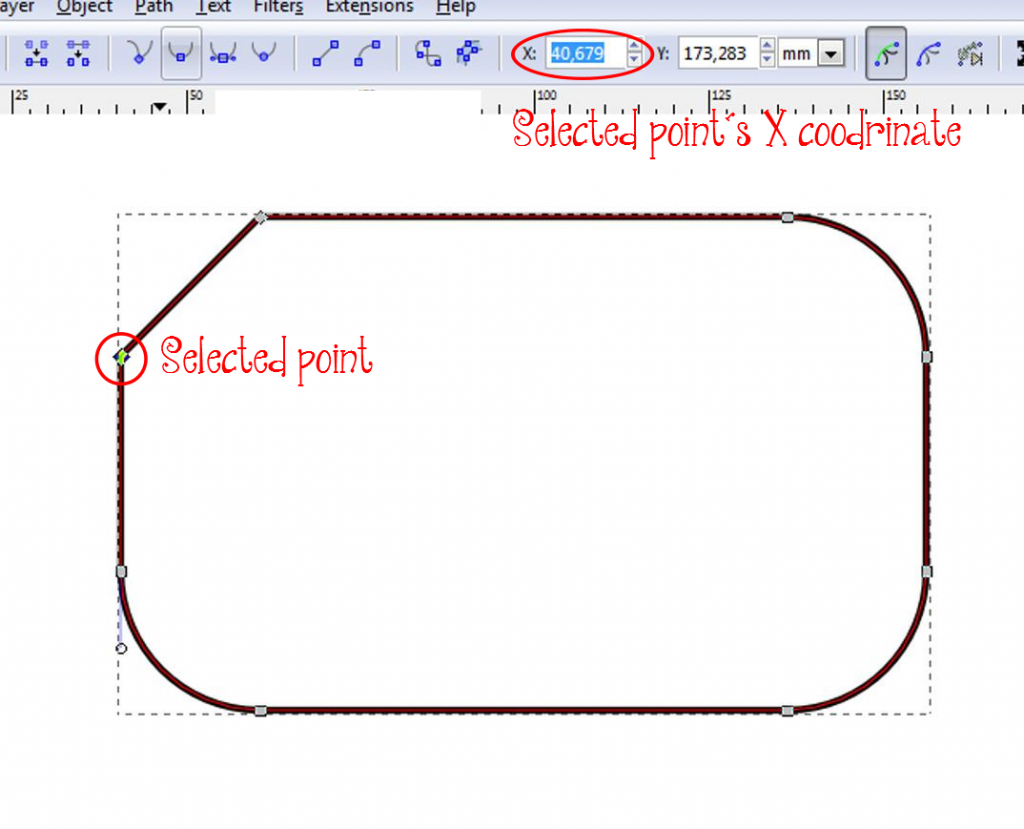
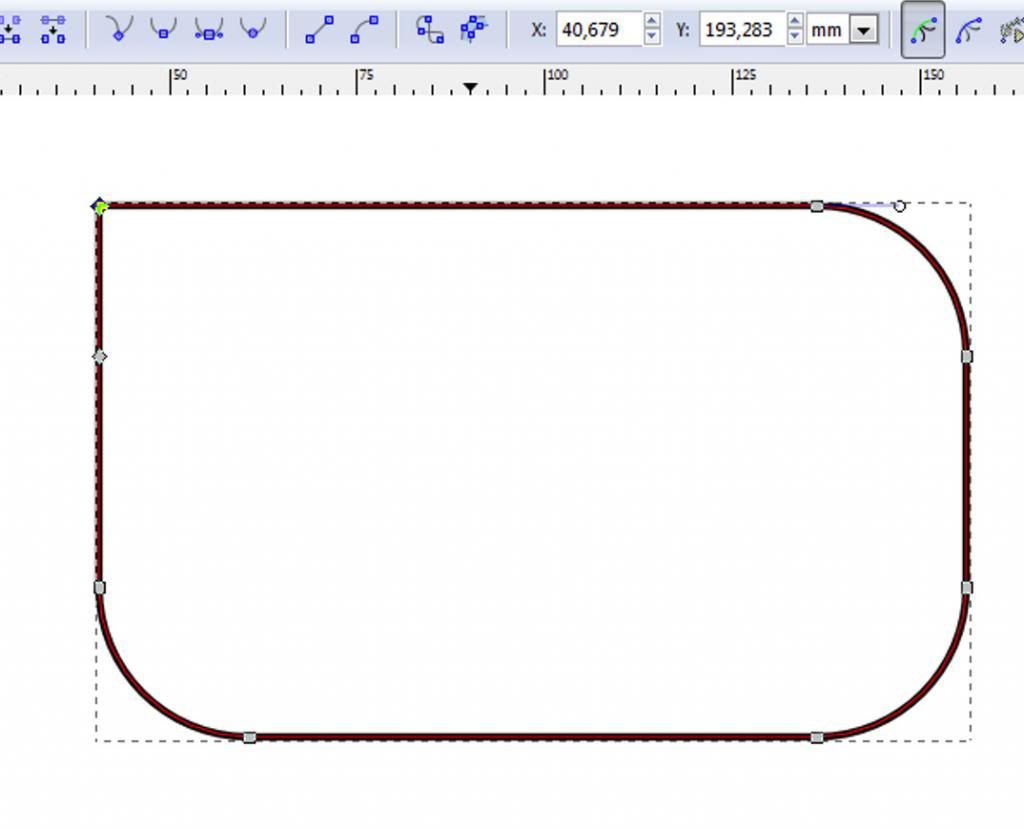
Click on the lower of the two point and read off its X coordinate. You can copy it or just remember it.
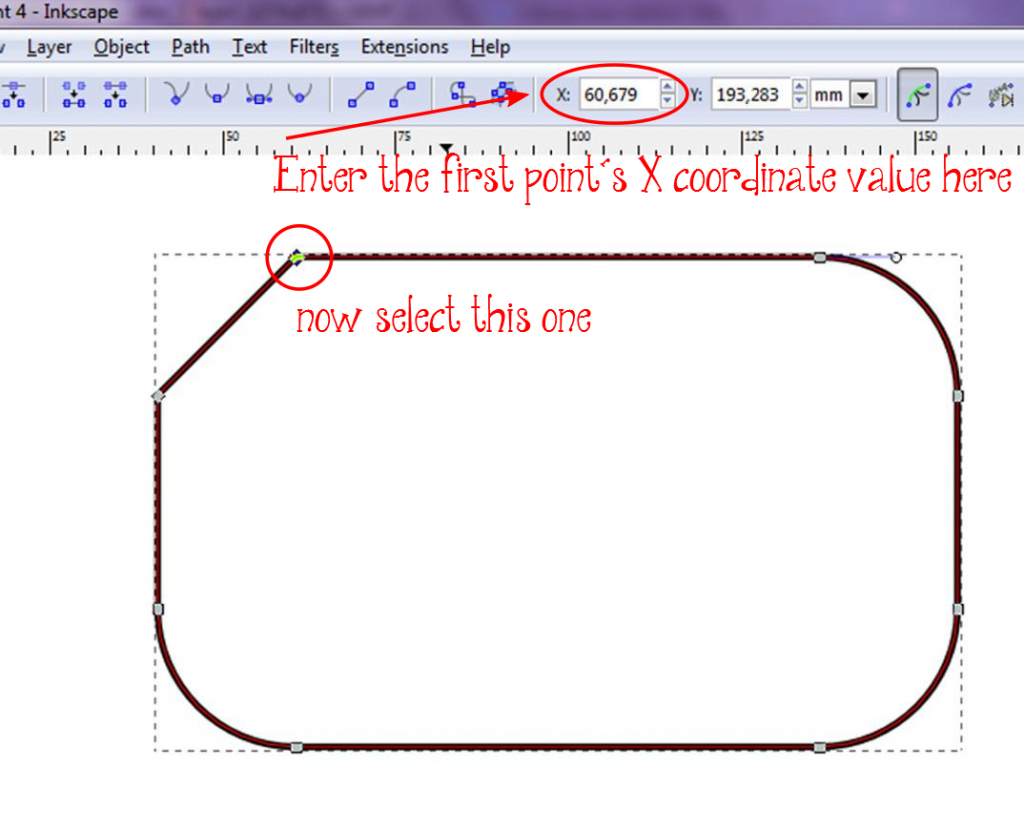
Click on your upper selected point and enter the same X coordinate. This will shift that point to to right above he other one, giving you a straight angle.
There! All done! OK, so it's technically about 14 clicks, but "10 clicks" sounds better, right? This was the simplest way to do something like this, for me. I hope it helps someone out there who's starting out in Inkscape, too.
If you've enjoyed this little tutorial of mine, leave a comment and feel free to check out my other posts. Until next Thursday!
LaDIY Tasha


No comments:
Post a Comment